カテゴリー: プログラミング

  • 【実践】Flutter MVVMアーキテクチャ入門|Riverpodで実装するTodoアプリ

    【実践】Flutter MVVMアーキテクチャ入門|Riverpodで実装するTodoアプリ

    「StatefulWidgetにロジックを直書きしてたら、コードがカオスになってきた…」
    「BLoCは学習コストが高くて挫折した」
    「MVVMって聞くけど、Flutterでどう実装すればいいの?」

    そんな悩みをお持ちではありませんか?

    結論からお伝えすると、FlutterでMVVMアーキテクチャを採用すれば、UIとビジネスロジックを明確に分離でき、保守性・テスタビリティが大幅に向上します。特にRiverpodと組み合わせることで、シンプルかつ強力な状態管理が実現できます。

    この記事では、他のアーキテクチャから移行したい中級者向けに、MVVMの概念説明から実際のTodoアプリ実装まで、コード付きで詳しく解説します。

    この記事でわかること

    • MVVMアーキテクチャの基本概念とFlutterでの適用方法
    • MVC/MVPとの違いと、MVVMを選ぶべき理由
    • Riverpodを使ったMVVMの実装パターン
    • Todoアプリを題材にした実践的なコード例
    • MVVM導入時の注意点とベストプラクティス

    Flutter MVVMとは?30秒でわかる基礎知識

    Flutter MVVMとは?30秒でわかる基礎知識

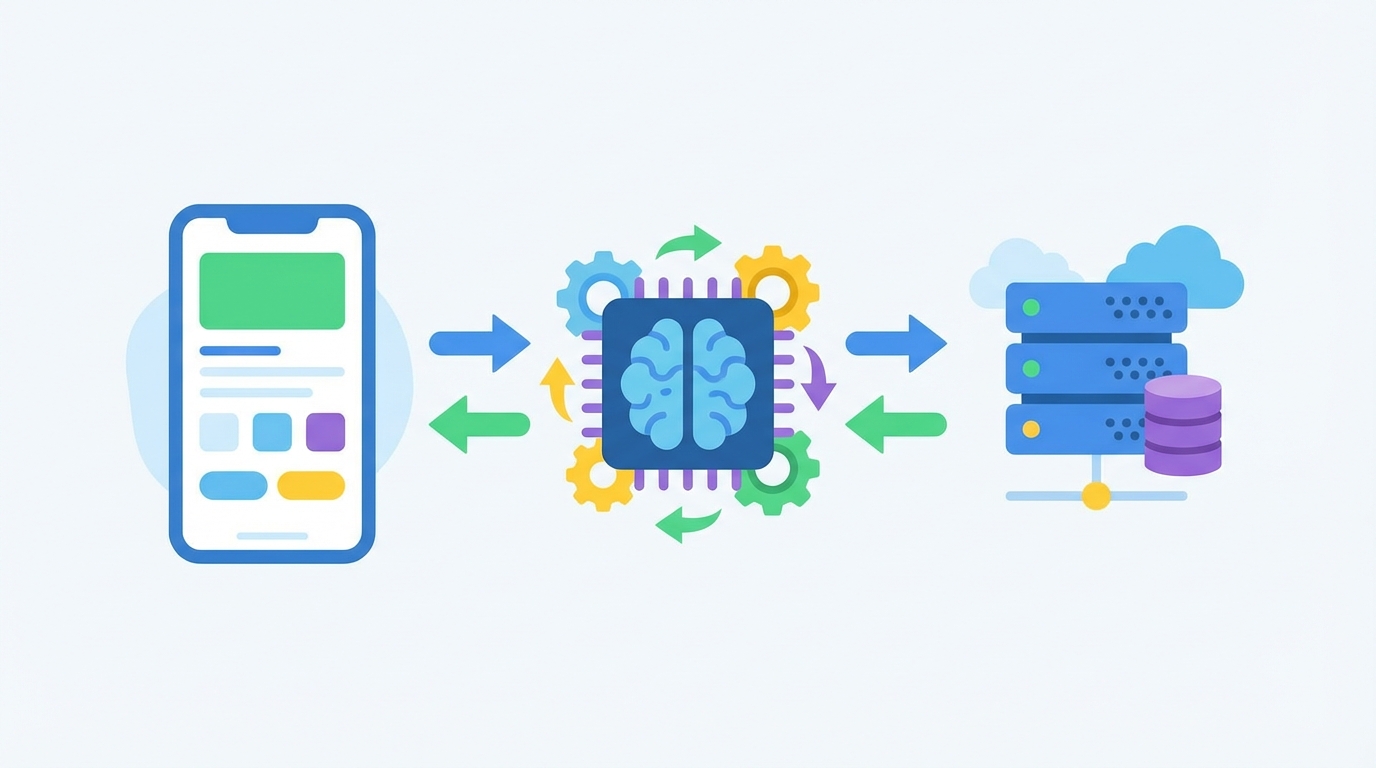
    MVVM(Model-View-ViewModel)は、アプリケーションを3つの層に分離するアーキテクチャパターンです。元々はMicrosoftがWPF向けに提唱したものですが、現在ではモバイルアプリ開発でも広く採用されています。
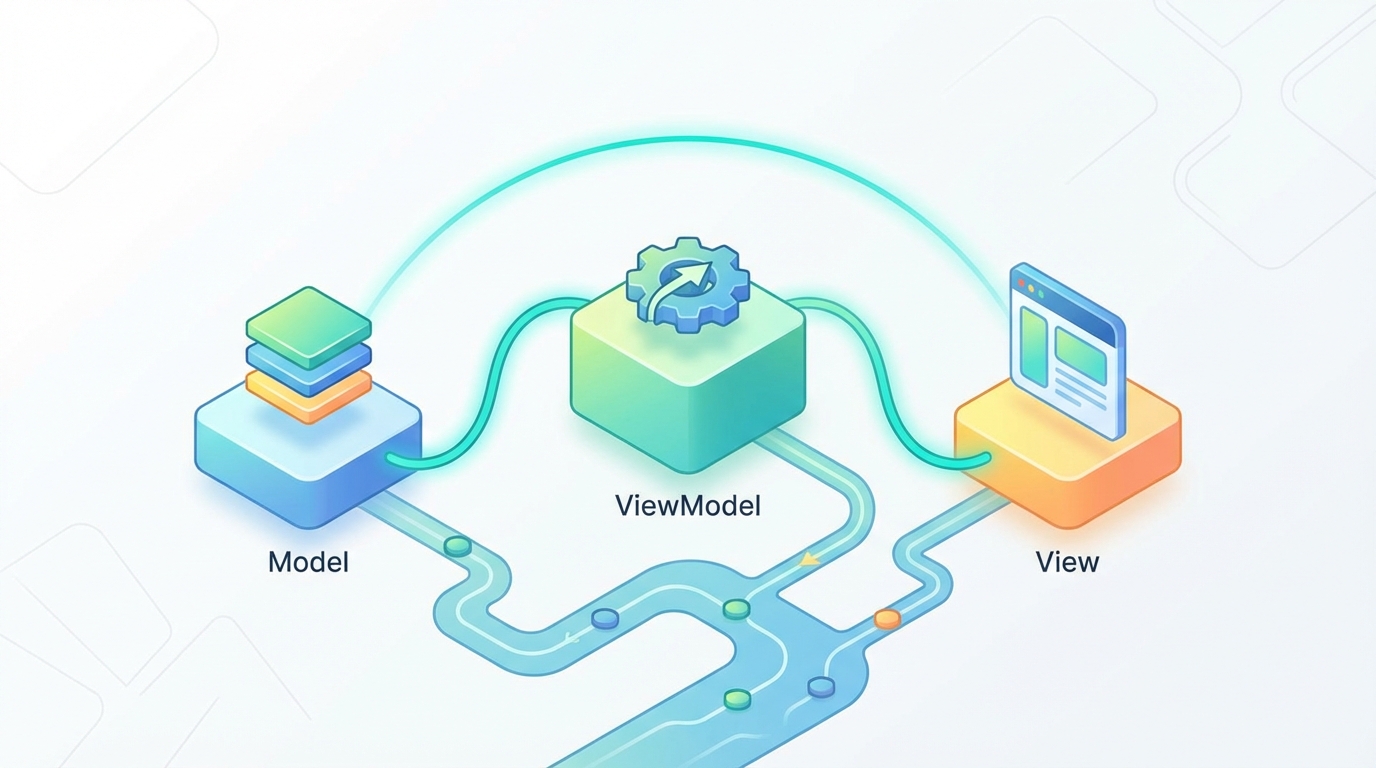
    MVVMの3つの構成要素

    Model(モデル)
    データ構造とビジネスロジックを担当します。APIからのレスポンス、データベースのエンティティ、ドメインロジックなどがここに含まれます。UIのことは一切知りません。

    View(ビュー)
    UIの描画のみを担当します。Flutterでは、StatelessWidgetやStatefulWidgetがこれに該当します。Viewは「何を表示するか」だけに集中し、ビジネスロジックは持ちません。

    ViewModel(ビューモデル)
    ViewとModelの橋渡し役です。Modelから取得したデータをViewが使いやすい形に変換し、Viewからのユーザー操作を受け取ってModelを更新します。Riverpodでは、NotifierやAsyncNotifierがこの役割を担います。

    MVCやMVPとの違い

    MVVMと似たパターンにMVC(Model-View-Controller)やMVP(Model-View-Presenter)があります。大きな違いは「ViewとModelの依存関係」です。

    MVCでは、ViewがModelの状態を直接参照することがあります。ControllerはユーザーからのInputに対応してModelを操作しますが、ViewとModelが密結合になりやすい傾向があります。

    MVVMでは、ViewはViewModelだけを知っていれば良く、Modelの存在を意識しません。ViewModelがModelの状態を監視し、Viewが使いやすい形に加工して提供します。これにより、ViewとModelが完全に分離され、それぞれを独立してテスト・変更できます。

    FlutterでMVVMを選ぶメリット

    Flutterは宣言的UIフレームワークです。「状態が変わったらUIを再構築する」という考え方は、MVVMのデータバインディングと非常に相性が良いです。

    具体的なメリットは以下の通りです。

    • 関心の分離:UIロジックとビジネスロジックが明確に分かれる
    • テスタビリティ:ViewModelを単体でテストできる
    • 再利用性:ViewModelを別のViewで使い回せる
    • チーム開発:UI担当とロジック担当で並行作業しやすい

    MVVMの各レイヤーの役割と責務

    MVVMの各レイヤーの役割と責務

    実装に入る前に、各レイヤーの責務をもう少し詳しく整理しておきましょう。

    Model層:データとビジネスロジック

    Model層には以下が含まれます。

    • エンティティ/データクラス:Todoアイテム、ユーザー情報などのデータ構造
    • ビジネスロジック:データの検証、計算、変換などのルール
    • Repository:データソース(API、DB、ローカルストレージ)へのアクセスを抽象化

    ポイントは、Model層がUIフレームワーク(Flutter)に依存しないことです。純粋なDartコードで書かれ、どこからでも再利用できます。

    View層:UIの描画に専念

    View層の責務はシンプルです。

    • ViewModelから受け取ったデータを表示する
    • ユーザーの操作(タップ、入力など)をViewModelに伝える

    View層では、条件分岐やループは許容されますが、ビジネスロジック(「このデータをどう加工するか」「このアクションで何を更新するか」)は書きません。

    ViewModel層:状態管理と変換ロジック

    ViewModel層が担う責務は以下の通りです。

    • Viewが必要とする状態を保持・公開する
    • Modelから取得したデータをView向けに変換する
    • Viewからのアクションを受け取り、Modelを更新する
    • 非同期処理(API呼び出しなど)の状態管理

    Riverpodでは、Notifier(同期)やAsyncNotifier(非同期)がViewModelの役割を果たします。

    Repository層:データアクセスの抽象化

    厳密にはMVVMの構成要素ではありませんが、実務ではRepository層を追加するのが一般的です。

    Repositoryは「データをどこから取得するか」を隠蔽します。ViewModelから見ると、データがAPIから来るのか、ローカルDBから来るのか、キャッシュから来るのかを意識する必要がありません。これにより、データソースの切り替えやテスト時のモック差し替えが容易になります。

    RiverpodでMVVMを実装する

    RiverpodでMVVMを実装する

    FlutterでMVVMを実装する際、状態管理ライブラリの選択が重要です。ここではRiverpodを使用します。

    なぜRiverpodか

    Riverpodは、Providerパッケージの作者であるRemi Rousselet氏が開発した次世代の状態管理ライブラリです。

    Providerと比較した主なメリットは以下の通りです。

    • コンパイル時安全性:ProviderNotFoundExceptionのような実行時エラーが発生しない
    • BuildContext不要:Widgetツリーの外からでもProviderにアクセスできる
    • 自動破棄:使われなくなったProviderは自動的にDisposeされる
    • テストしやすい:Providerのオーバーライドが簡単

    BLoCと比較すると、Riverpodはボイラープレートが少なく、学習コストも低めです。MVVMパターンとの相性も良く、NotifierがそのままViewModelとして機能します。

    プロジェクト構成(フォルダ構造)

    MVVMを採用する際の典型的なフォルダ構成は以下の通りです。

    
    lib/
    ├── main.dart
    ├── models/              # Model層
    │   └── todo.dart
    ├── repositories/        # Repository層
    │   └── todo_repository.dart
    ├── view_models/         # ViewModel層
    │   └── todo_view_model.dart
    ├── views/               # View層
    │   ├── todo_list_view.dart
    │   └── widgets/
    │       └── todo_item.dart
    └── providers/           # Providerの定義
        └── providers.dart
    

    機能ごとにフォルダを分ける(feature-first)アプローチもありますが、小〜中規模のプロジェクトでは、上記のレイヤーごとの構成がシンプルでわかりやすいです。

    必要なパッケージ

    pubspec.yamlに以下を追加します。

    
    dependencies:
      flutter:
        sdk: flutter
      flutter_riverpod: ^2.5.1
      freezed_annotation: ^2.4.1
    
    dev_dependencies:
      flutter_test:
        sdk: flutter
      build_runner: ^2.4.8
      freezed: ^2.4.7
    

    freezedはイミュータブルなデータクラスを簡単に作成するためのパッケージです。Model層のデータクラス定義に使用します。

    なお、2025年9月にRiverpod 3.0がリリースされ、自動リトライ機能やオフラインサポートなどの新機能が追加されています。本記事のコードはRiverpod 2.x系で動作しますが、3.0への移行も比較的スムーズに行えます。

    【実装】TodoアプリでMVVMを体験

    【実装】TodoアプリでMVVMを体験

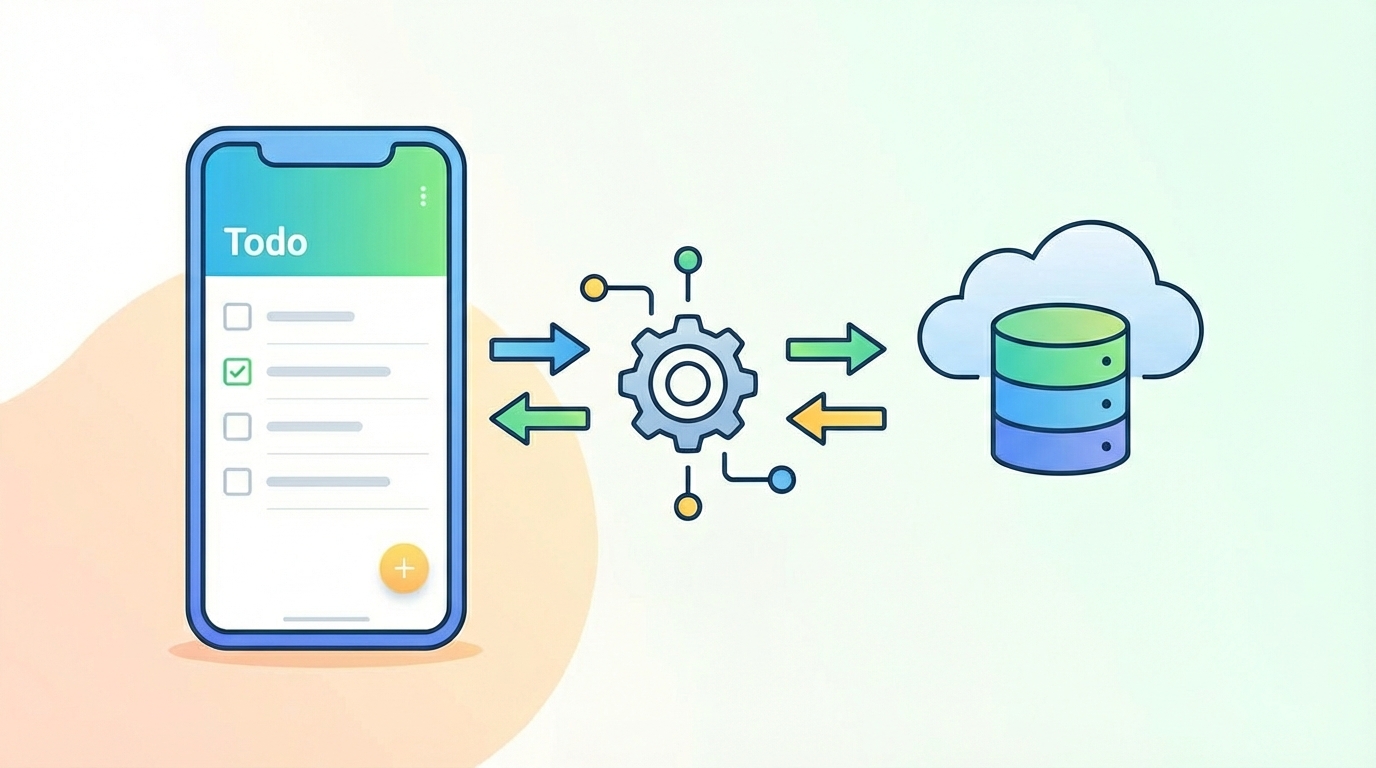
    それでは、実際にTodoアプリを作りながらMVVMの実装方法を見ていきましょう。

    Model層の実装

    まず、Todoアイテムのデータクラスを定義します。

    
    // lib/models/todo.dart
    import ‘package:freezed_annotation/freezed_annotation.dart’;
    
    part ‘todo.freezed.dart’;
    part ‘todo.g.dart’;
    
    @freezed
    class Todo with _$Todo {
      const factory Todo({
        required String id,
        required String title,
        @Default(false) bool isCompleted,
        DateTime? createdAt,
      }) = _Todo;
    
      factory Todo.fromJson(Map json) => _$TodoFromJson(json);
    }
    

    freezedを使うことで、copyWith、==演算子、hashCode、toStringなどが自動生成されます。以下のコマンドでコード生成を実行します。

    
    flutter pub run build_runner build –delete-conflicting-outputs
    

    Repository層の実装

    次に、Todoデータへのアクセスを抽象化するRepositoryを作成します。

    
    // lib/repositories/todo_repository.dart
    import ‘../models/todo.dart’;
    
    abstract class TodoRepository {
      Future<List> fetchTodos();
      Future addTodo(Todo todo);
      Future updateTodo(Todo todo);
      Future deleteTodo(String id);
    }
    
    // インメモリ実装(実際のアプリではAPI呼び出しやDB操作に置き換え)
    class InMemoryTodoRepository implements TodoRepository {
      final List _todos = [];
    
      @override
      Future<List> fetchTodos() async {
        // APIコールをシミュレート
        await Future.delayed(const Duration(milliseconds: 500));
        return List.unmodifiable(_todos);
      }
    
      @override
      Future addTodo(Todo todo) async {
        await Future.delayed(const Duration(milliseconds: 200));
        _todos.add(todo);
      }
    
      @override
      Future updateTodo(Todo todo) async {
        await Future.delayed(const Duration(milliseconds: 200));
        final index = _todos.indexWhere((t) => t.id == todo.id);
        if (index != -1) {
          _todos[index] = todo;
        }
      }
    
      @override
      Future deleteTodo(String id) async {
        await Future.delayed(const Duration(milliseconds: 200));
        _todos.removeWhere((t) => t.id == id);
      }
    }
    

    抽象クラスを定義しておくことで、テスト時にモックに差し替えたり、将来的にFirestoreやSQLiteに移行したりすることが容易になります。

    ViewModel層の実装(Notifier)

    ViewModelとして機能するNotifierを実装します。

    
    // lib/view_models/todo_view_model.dart
    import ‘package:flutter_riverpod/flutter_riverpod.dart’;
    import ‘../models/todo.dart’;
    import ‘../repositories/todo_repository.dart’;
    
    // Todoリストの状態を管理するViewModel
    class TodoListNotifier extends AsyncNotifier<List> {
      late final TodoRepository _repository;
    
      @override
      Future<List> build() async {
        _repository = ref.read(todoRepositoryProvider);
        return _repository.fetchTodos();
      }
    
      // Todoを追加
      Future addTodo(String title) async {
        final newTodo = Todo(
          id: DateTime.now().millisecondsSinceEpoch.toString(),
          title: title,
          createdAt: DateTime.now(),
        );
    
        // 楽観的更新:UIを先に更新
        state = AsyncData([…state.value ?? [], newTodo]);
    
        try {
          await _repository.addTodo(newTodo);
        } catch (e) {
          // エラー時はリフェッチ
          state = await AsyncValue.guard(() => _repository.fetchTodos());
          rethrow;
        }
      }
    
      // Todoの完了状態を切り替え
      Future toggleTodo(String id) async {
        final todos = state.value ?? [];
        final index = todos.indexWhere((t) => t.id == id);
        if (index == -1) return;
    
        final todo = todos[index];
        final updatedTodo = todo.copyWith(isCompleted: !todo.isCompleted);
    
        // 楽観的更新
        final updatedList = […todos];
        updatedList[index] = updatedTodo;
        state = AsyncData(updatedList);
    
        try {
          await _repository.updateTodo(updatedTodo);
        } catch (e) {
          state = await AsyncValue.guard(() => _repository.fetchTodos());
          rethrow;
        }
      }
    
      // Todoを削除
      Future deleteTodo(String id) async {
        final todos = state.value ?? [];
    
        // 楽観的更新
        state = AsyncData(todos.where((t) => t.id != id).toList());
    
        try {
          await _repository.deleteTodo(id);
        } catch (e) {
          state = await AsyncValue.guard(() => _repository.fetchTodos());
          rethrow;
        }
      }
    
      // 完了済みTodoの数を取得(派生状態)
      int get completedCount => 
          state.value?.where((t) => t.isCompleted).length ?? 0;
    
      // 未完了Todoの数を取得
      int get pendingCount => 
          state.value?.where((t) => !t.isCompleted).length ?? 0;
    }
    

    ポイントは「楽観的更新」です。APIの応答を待たずにUIを先に更新することで、ユーザー体験が向上します。エラー発生時は、サーバーから最新データを再取得して状態を修正します。

    Providerの定義

    ProviderをまとめたファイルI作成します。

    
    // lib/providers/providers.dart
    import ‘package:flutter_riverpod/flutter_riverpod.dart’;
    import ‘../repositories/todo_repository.dart’;
    import ‘../view_models/todo_view_model.dart’;
    
    // Repositoryのプロバイダー
    final todoRepositoryProvider = Provider((ref) {
      return InMemoryTodoRepository();
    });
    
    // ViewModelのプロバイダー
    final todoListProvider = AsyncNotifierProvider<TodoListNotifier, List>(
      TodoListNotifier.new,
    );
    
    // 派生状態:完了済みTodoの数
    final completedCountProvider = Provider((ref) {
      final todosAsync = ref.watch(todoListProvider);
      return todosAsync.value?.where((t) => t.isCompleted).length ?? 0;
    });
    
    // 派生状態:未完了Todoの数
    final pendingCountProvider = Provider((ref) {
      final todosAsync = ref.watch(todoListProvider);
      return todosAsync.value?.where((t) => !t.isCompleted).length ?? 0;
    });
    

    View層の実装

    最後に、UIを実装します。

    
    // lib/views/todo_list_view.dart
    import ‘package:flutter/material.dart’;
    import ‘package:flutter_riverpod/flutter_riverpod.dart’;
    import ‘../providers/providers.dart’;
    import ‘../models/todo.dart’;
    
    class TodoListView extends ConsumerWidget {
      const TodoListView({super.key});
    
      @override
      Widget build(BuildContext context, WidgetRef ref) {
        final todosAsync = ref.watch(todoListProvider);
        final completedCount = ref.watch(completedCountProvider);
        final pendingCount = ref.watch(pendingCountProvider);
    
        return Scaffold(
          appBar: AppBar(
            title: const Text(‘Todo App (MVVM)’),
            actions: [
              Center(
                child: Padding(
                  padding: const EdgeInsets.only(right: 16),
                  child: Text(‘完了: $completedCount / 残り: $pendingCount’),
                ),
              ),
            ],
          ),
          body: todosAsync.when(
            data: (todos) => todos.isEmpty
                ? const Center(child: Text(‘Todoがありません’))
                : ListView.builder(
                    itemCount: todos.length,
                    itemBuilder: (context, index) {
                      final todo = todos[index];
                      return TodoItem(todo: todo);
                    },
                  ),
            loading: () => const Center(child: CircularProgressIndicator()),
            error: (error, stack) => Center(
              child: Column(
                mainAxisAlignment: MainAxisAlignment.center,
                children: [
                  Text(‘エラー: $error’),
                  ElevatedButton(
                    onPressed: () => ref.invalidate(todoListProvider),
                    child: const Text(‘再読み込み’),
                  ),
                ],
              ),
            ),
          ),
          floatingActionButton: FloatingActionButton(
            onPressed: () => _showAddTodoDialog(context, ref),
            child: const Icon(Icons.add),
          ),
        );
      }
    
      void _showAddTodoDialog(BuildContext context, WidgetRef ref) {
        final controller = TextEditingController();
    
        showDialog(
          context: context,
          builder: (context) => AlertDialog(
            title: const Text(‘新しいTodo’),
            content: TextField(
              controller: controller,
              autofocus: true,
              decoration: const InputDecoration(
                hintText: ‘Todoのタイトル’,
              ),
            ),
            actions: [
              TextButton(
                onPressed: () => Navigator.pop(context),
                child: const Text(‘キャンセル’),
              ),
              TextButton(
                onPressed: () {
                  final title = controller.text.trim();
                  if (title.isNotEmpty) {
                    ref.read(todoListProvider.notifier).addTodo(title);
                    Navigator.pop(context);
                  }
                },
                child: const Text(‘追加’),
              ),
            ],
          ),
        );
      }
    }
    
    // Todoアイテムのウィジェット
    class TodoItem extends ConsumerWidget {
      final Todo todo;
    
      const TodoItem({super.key, required this.todo});
    
      @override
      Widget build(BuildContext context, WidgetRef ref) {
        return Dismissible(
          key: Key(todo.id),
          direction: DismissDirection.endToStart,
          onDismissed: (_) {
            ref.read(todoListProvider.notifier).deleteTodo(todo.id);
          },
          background: Container(
            color: Colors.red,
            alignment: Alignment.centerRight,
            padding: const EdgeInsets.only(right: 16),
            child: const Icon(Icons.delete, color: Colors.white),
          ),
          child: ListTile(
            leading: Checkbox(
              value: todo.isCompleted,
              onChanged: (_) {
                ref.read(todoListProvider.notifier).toggleTodo(todo.id);
              },
            ),
            title: Text(
              todo.title,
              style: TextStyle(
                decoration: todo.isCompleted
                    ? TextDecoration.lineThrough
                    : TextDecoration.none,
                color: todo.isCompleted ? Colors.grey : null,
              ),
            ),
          ),
        );
      }
    }
    

    main.dartの設定

    最後に、アプリのエントリーポイントを設定します。

    
    // lib/main.dart
    import ‘package:flutter/material.dart’;
    import ‘package:flutter_riverpod/flutter_riverpod.dart’;
    import ‘views/todo_list_view.dart’;
    
    void main() {
      runApp(
        const ProviderScope(
          child: MyApp(),
        ),
      );
    }
    
    class MyApp extends StatelessWidget {
      const MyApp({super.key});
    
      @override
      Widget build(BuildContext context) {
        return MaterialApp(
          title: ‘Flutter MVVM Demo’,
          theme: ThemeData(
            colorScheme: ColorScheme.fromSeed(seedColor: Colors.blue),
            useMaterial3: true,
          ),
          home: const TodoListView(),
        );
      }
    }
    

    これで、MVVMアーキテクチャに基づいたTodoアプリが完成です。

    MVVMを導入するときの注意点

    MVVMを導入するときの注意点

    MVVMは強力なパターンですが、導入時にいくつか注意すべき点があります。

    ViewModelが肥大化しやすい問題

    すべてのロジックをViewModelに詰め込むと、巨大なクラスになりがちです。対策として以下を意識しましょう。

    • ビジネスロジックはModel層(またはUseCase層)に分離する
    • 1つのViewModelは1つの画面または機能に対応させる
    • 複数の画面で共有する状態は、別のProviderに切り出す

    テスタビリティを意識した設計

    MVVMのメリットを最大限活かすには、テストしやすい設計が重要です。

    • Repositoryは抽象クラス(インターフェース)として定義する
    • ViewModelはRepositoryをコンストラクタで受け取る(依存性注入)
    • Providerのオーバーライド機能を活用してモックを差し替える
    
    // テスト例
    void main() {
      test(‘addTodoでリストに追加される’, () async {
        final container = ProviderContainer(
          overrides: [
            todoRepositoryProvider.overrideWithValue(MockTodoRepository()),
          ],
        );
    
        final notifier = container.read(todoListProvider.notifier);
        await notifier.addTodo(‘テストTodo’);
    
        final todos = container.read(todoListProvider).value;
        expect(todos?.length, 1);
        expect(todos?.first.title, ‘テストTodo’);
      });
    }
    

    小規模アプリには過剰な場合も

    MVVMは中〜大規模アプリで真価を発揮します。数画面程度の小規模アプリでは、オーバーエンジニアリングになる可能性があります。

    プロジェクトの規模や将来の拡張性を考慮して、適切なアーキテクチャを選択しましょう。小さく始めて、複雑になってきたらMVVMに移行するアプローチも有効です。

    よくある質問(FAQ)

    よくある質問(FAQ)

    Q. BLoCとの使い分けは?

    BLoCとMVVM(Riverpod)は、どちらも状態管理とUIの分離を目的としています。

    BLoCはStreamベースで、イベント駆動のアプローチを取ります。複雑な非同期フローや、厳格なアーキテクチャルールを求めるチームに向いています。一方、Riverpodはよりシンプルで柔軟性が高く、学習コストも低めです。

    チームの経験や好み、プロジェクトの要件に応じて選択してください。どちらを選んでも、MVVMの考え方(UIとロジックの分離)は適用できます。

    Q. Clean Architectureとの関係は?

    Clean Architectureは、MVVMよりも広範なアーキテクチャパターンです。Domain層、Data層、Presentation層という3層構造を持ち、依存関係のルール(内側から外側への依存のみ許可)を定めています。

    MVVMはPresentationルの設計パターンとして、Clean Architectureの中に組み込むことができます。大規模プロジェクトでは、Clean Architecture + MVVMの組み合わせがよく採用されます。

    Q. 既存プロジェクトへの導入方法は?

    一度にすべてを書き換える必要はありません。以下のステップで段階的に移行できます。

    1. まずRiverpodを導入し、新規画面からMVVMで実装する
    2. 既存画面のリファクタリング時に、少しずつMVVMに移行する
    3. 共通のRepositoryやProviderを整備していく

    StatefulWidgetのsetStateで管理していた状態を、まずStateNotifierProviderに移すところから始めるのがおすすめです。

    まとめ:MVVMで保守性の高いFlutterアプリを

    まとめ:MVVMで保守性の高いFlutterアプリを

    この記事では、FlutterにおけるMVVMアーキテクチャの実装方法を解説しました。

    重要ポイント

    • MVVMは、Model(データ)・View(UI)・ViewModel(状態管理)の3層に分離するパターン
    • Flutterの宣言的UIとMVVMのデータバインディングは相性が良い
    • Riverpodを使えば、シンプルかつ強力なMVVM実装が可能
    • Repository層を追加することで、データアクセスを抽象化できる
    • 楽観的更新でUXを向上させ、エラー時はリフェッチで整合性を保つ

    次のステップ

    1. この記事のTodoアプリを実際に動かしてみる
    2. 自分のプロジェクトで1画面だけMVVMで実装してみる
    3. テストコードを書いて、テスタビリティの向上を体感する
    4. 必要に応じてClean ArchitectureやDDD(ドメイン駆動設計)を学ぶ

    MVVMは「銀の弾丸」ではありませんが、UIとビジネスロジックを分離する明確な指針を与えてくれます。まずは小さく始めて、徐々にパターンに慣れていってください。

  • 【実践】GoFデザインパターン6選をTypeScriptで実装|現場で使える実例付き

    【実践】GoFデザインパターン6選をTypeScriptで実装|現場で使える実例付き

    「デザインパターンって、結局いつ使うの?」
    「GoFの23パターンを全部覚える必要ある?」
    「TypeScriptで書くとき、Javaの例と何が違うの?」

    こんな疑問を持ったことはありませんか?

    結論から言うと、実務で頻繁に使うパターンは限られています。すべてを暗記する必要はなく、「この問題にはこのパターン」という引き出しを持っておくことが重要です。

    この記事では、TypeScript中級者向けに、実務で本当に役立つGoFデザインパターン6つを厳選し、少し難しめの実践的なコード例とともに解説します。単なる「動物クラスを継承して犬と猫を作る」ような教科書的な例ではなく、APIクライアント、決済処理、イベント駆動など、現場で遭遇するシナリオを題材にしています。

    この記事でわかること

    • デザインパターンを学ぶべき理由と学習のコツ
    • Factory Method:条件分岐の散らばりを解消する
    • Singleton:設定管理やコネクションプールの実装
    • Adapter:外部APIやレガシーコードとの接続
    • Decorator:ミドルウェア的な機能追加
    • Strategy:差し替え可能なアルゴリズムの設計
    • Observer:イベント駆動と状態監視の実装

    なぜ今デザインパターンを学ぶのか

    「フレームワークが進化した今、デザインパターンなんて古い」という意見もあります。確かに、ReactやNext.jsを使えば、パターンを意識しなくてもアプリケーションは作れます。

    しかし、以下のような場面に遭遇したことはないでしょうか。

    • 機能追加のたびに if-else が増えていく
    • 似たような処理があちこちに散らばっている
    • 「この設計、なんかモヤモヤする」けど言語化できない
    • レビューで「もっといい書き方ありそう」と言われる

    デザインパターンは、こうした「設計の悩み」に名前を与え、解決策を提供してくれます。パターンを知っていれば、チーム内で「これはStrategyで書こう」と一言で意図が伝わります。

    TypeScriptとデザインパターンの相性は非常に良いです。インターフェース、ジェネリクス、アクセス修飾子など、パターンを表現するための言語機能が揃っています。

    生成パターン

    Factory Method:インスタンス生成の条件分岐を解消する

    どんな問題を解決するか

    「ユーザーの種別によって異なるオブジェクトを生成したい」という要件は頻繁に発生します。素朴に書くと、こうなりがちです。

    // ❌ Before: 条件分岐が散らばる function createNotification(type: string, message: string) { if (type === ‘email’) { return { send: () => sendEmail(message) }; } else if (type === ‘slack’) { return { send: () => sendSlack(message) }; } else if (type === ‘sms’) { return { send: () => sendSMS(message) }; } throw new Error(‘Unknown notification type’); }

    この書き方の問題点は、新しい通知タイプを追加するたびにこの関数を修正する必要があることです。また、各通知タイプ固有の設定(SMTPサーバー、Webhook URLなど)をどこで管理するかも曖昧になります。

    TypeScriptでの実装

    Factory Methodパターンを使うと、インスタンス生成のロジックをサブクラスに委譲できます。

    // 通知の共通インターフェース interface Notification { send(message: string): Promise; getChannel(): string; } // 各通知タイプの実装 class EmailNotification implements Notification { constructor( private smtpHost: string, private from: string ) {} async send(message: string): Promise { console.log(<code>Sending email via ${this.smtpHost}: ${message}</code>); // 実際のメール送信処理 } getChannel(): string { return ‘email’; } } class SlackNotification implements Notification { constructor(private webhookUrl: string) {} async send(message: string): Promise { console.log(<code>Posting to Slack: ${message}</code>); // 実際のSlack送信処理 } getChannel(): string { return ‘slack’; } } class SMSNotification implements Notification { constructor( private apiKey: string, private phoneNumber: string ) {} async send(message: string): Promise { console.log(<code>Sending SMS to ${this.phoneNumber}: ${message}</code>); // 実際のSMS送信処理 } getChannel(): string { return ‘sms’; } } // Factory(抽象クラス) abstract class NotificationFactory { abstract createNotification(): Notification; // テンプレートメソッド:共通処理を定義 async notify(message: string): Promise { const notification = this.createNotification(); console.log(<code>[${notification.getChannel()}] Preparing to send...</code>); await notification.send(message); console.log(<code>[${notification.getChannel()}] Sent successfully</code>); } } // 具体的なFactory class EmailNotificationFactory extends NotificationFactory { constructor( private smtpHost: string, private from: string ) { super(); } createNotification(): Notification { return new EmailNotification(this.smtpHost, this.from); } } class SlackNotificationFactory extends NotificationFactory { constructor(private webhookUrl: string) { super(); } createNotification(): Notification { return new SlackNotification(this.webhookUrl); } } // 使用例 const factories: Record = { email: new EmailNotificationFactory(‘smtp.example.com’, ‘noreply@example.com’), slack: new SlackNotificationFactory(‘https://hooks.slack.com/xxx’), }; async function sendAlert(channel: string, message: string) { const factory = factories[channel]; if (!factory) { throw new Error(<code>Unknown channel: ${channel}</code>); } await factory.notify(message); } // 実行 sendAlert(‘slack’, ‘サーバーエラーが発生しました’);

    使いどころ

    • 生成するオブジェクトの種類が複数あり、それぞれ初期化ロジックが異なる
    • 新しい種類を追加する可能性が高い
    • 生成処理の前後に共通の処理(ログ出力、バリデーションなど)を挟みたい

    Singleton:アプリケーション全体で共有するインスタンス

    どんな問題を解決するか

    設定情報、データベースコネクション、ロガーなど、アプリケーション全体で1つだけ存在すべきオブジェクトがあります。毎回 new するとリソースの無駄になったり、状態の不整合が起きたりします。

    TypeScriptでの実装

    TypeScriptでは、モジュールスコープを利用したシンプルな実装が可能です。

    // config.ts – 設定管理のSingleton interface AppConfig { apiBaseUrl: string; apiTimeout: number; logLevel: ‘debug’ | ‘info’ | ‘warn’ | ‘error’; features: { darkMode: boolean; betaFeatures: boolean; }; } class ConfigManager { private static instance: ConfigManager | null = null; private config: AppConfig | null = null; private initialized = false; private constructor() { // privateコンストラクタで外部からのnewを禁止 } static getInstance(): ConfigManager { if (!ConfigManager.instance) { ConfigManager.instance = new ConfigManager(); } return ConfigManager.instance; } async initialize(configSource: string): Promise { if (this.initialized) { console.warn(‘ConfigManager is already initialized’); return; } // 実際のアプリでは外部ファイルやAPIから読み込む console.log(<code>Loading config from: ${configSource}</code>); this.config = { apiBaseUrl: ‘https://api.example.com’, apiTimeout: 5000, logLevel: ‘info’, features: { darkMode: true, betaFeatures: false, }, }; this.initialized = true; console.log(‘ConfigManager initialized’); } get(key: K): AppConfig[K] { if (!this.config) { throw new Error(‘ConfigManager not initialized. Call initialize() first.’); } return this.config[key]; } getAll(): Readonly { if (!this.config) { throw new Error(‘ConfigManager not initialized’); } return Object.freeze({ …this.config }); } // テスト用:インスタンスをリセット static resetForTesting(): void { ConfigManager.instance = null; } } // 使用例 async function bootstrap() { const config = ConfigManager.getInstance(); await config.initialize(‘/config/production.json’); console.log(‘API URL:’, config.get(‘apiBaseUrl’)); console.log(‘Features:’, config.get(‘features’)); } // 別のモジュールからも同じインスタンスにアクセス function makeApiCall() { const config = ConfigManager.getInstance(); const baseUrl = config.get(‘apiBaseUrl’); const timeout = config.get(‘apiTimeout’); console.log(<code>Calling API: ${baseUrl} (timeout: ${timeout}ms)</code>); }

    注意点

    Singletonは便利ですが、使いすぎるとグローバル変数と同じ問題を引き起こします。テストが難しくなったり、依存関係が見えにくくなったりします。

    本当にアプリケーション全体で1つでなければならないか、DI(依存性注入)で代替できないか、を検討してから使いましょう。

    構造パターン

    Adapter:異なるインターフェースを橋渡しする

    どんな問題を解決するか

    外部のAPIライブラリやレガシーコードを使うとき、既存のコードが期待するインターフェースと合わないことがあります。Adapterパターンは、この「インターフェースの不一致」を解消します。

    TypeScriptでの実装

    複数の決済プロバイダー(Stripe、PayPal、国内決済など)を統一的に扱う例を考えます。

    // 自社システムが期待する決済インターフェース interface PaymentProcessor { processPayment(amount: number, currency: string): Promise; refund(transactionId: string, amount: number): Promise; getTransactionStatus(transactionId: string): Promise; } interface PaymentResult { success: boolean; transactionId: string; message: string; } interface RefundResult { success: boolean; refundId: string; } type TransactionStatus = ‘pending’ | ‘completed’ | ‘failed’ | ‘refunded’; // 外部ライブラリ(Stripe風)のインターフェース // 実際のStripe SDKとは異なりますが、イメージとして class StripeClient { async createCharge(params: { amount: number; currency: string; source: string; }): Promise { console.log(‘Stripe: Creating charge…’); return { id: <code>ch_${Date.now()}</code>, status: ‘succeeded’ }; } async createRefund(chargeId: string, amount: number): Promise { console.log(‘Stripe: Creating refund…’); return { id: <code>re_${Date.now()}</code> }; } async retrieveCharge(chargeId: string): Promise { return { status: ‘succeeded’ }; } } // 別の決済プロバイダー(PayPal風) class PayPalClient { async executePayment( paymentId: string, payerId: string, amount: { total: string; currency: string } ): Promise { console.log(‘PayPal: Executing payment…’); return { state: ‘approved’, id: <code>PAY-${Date.now()}</code> }; } async refundSale( saleId: string, refundRequest: { amount: { total: string; currency: string } } ): Promise { console.log(‘PayPal: Refunding sale…’); return { id: <code>REF-${Date.now()}</code>, state: ‘completed’ }; } } // Stripe用Adapter class StripeAdapter implements PaymentProcessor { private client: StripeClient; private defaultSource: string; constructor(apiKey: string, defaultSource: string) { this.client = new StripeClient(); this.defaultSource = defaultSource; console.log(<code>StripeAdapter initialized with key: ${apiKey.slice(0, 8)}...</code>); } async processPayment(amount: number, currency: string): Promise { try { const charge = await this.client.createCharge({ amount: Math.round(amount * 100), // Stripeはセント単位 currency: currency.toLowerCase(), source: this.defaultSource, }); return { success: charge.status === ‘succeeded’, transactionId: charge.id, message: charge.failure_message || ‘Payment processed successfully’, }; } catch (error) { return { success: false, transactionId: ”, message: error instanceof Error ? error.message : ‘Unknown error’, }; } } async refund(transactionId: string, amount: number): Promise { const result = await this.client.createRefund(transactionId, Math.round(amount * 100)); return { success: true, refundId: result.id, }; } async getTransactionStatus(transactionId: string): Promise { const charge = await this.client.retrieveCharge(transactionId); const statusMap: Record = { succeeded: ‘completed’, pending: ‘pending’, failed: ‘failed’, }; return statusMap[charge.status] || ‘pending’; } } // PayPal用Adapter class PayPalAdapter implements PaymentProcessor { private client: PayPalClient; private payerId: string; constructor(clientId: string, clientSecret: string, payerId: string) { this.client = new PayPalClient(); this.payerId = payerId; console.log(‘PayPalAdapter initialized’); } async processPayment(amount: number, currency: string): Promise { const paymentId = <code>PAYID-${Date.now()}</code>; const result = await this.client.executePayment(paymentId, this.payerId, { total: amount.toFixed(2), currency: currency.toUpperCase(), }); return { success: result.state === ‘approved’, transactionId: result.id, message: result.state === ‘approved’ ? ‘Payment approved’ : ‘Payment failed’, }; } async refund(transactionId: string, amount: number): Promise { const result = await this.client.refundSale(transactionId, { amount: { total: amount.toFixed(2), currency: ‘USD’ }, }); return { success: result.state === ‘completed’, refundId: result.id, }; } async getTransactionStatus(transactionId: string): Promise { // PayPalの実装に応じて変換 return ‘completed’; } } // 使用例:どのプロバイダーでも同じインターフェースで扱える class CheckoutService { constructor(private paymentProcessor: PaymentProcessor) {} async checkout(amount: number, currency: string): Promise { console.log(<code>Processing checkout for ${currency} ${amount}</code>); const result = await this.paymentProcessor.processPayment(amount, currency); if (result.success) { console.log(<code>Payment successful: ${result.transactionId}</code>); } else { console.log(<code>Payment failed: ${result.message}</code>); } } } // Stripeを使う場合 const stripeProcessor = new StripeAdapter(‘sk_test_xxx’, ‘tok_visa’); const checkoutWithStripe = new CheckoutService(stripeProcessor); // PayPalを使う場合 const paypalProcessor = new PayPalAdapter(‘client_id’, ‘secret’, ‘payer_123’); const checkoutWithPayPal = new CheckoutService(paypalProcessor);

    使いどころ

    • 外部ライブラリを自社のインターフェースに合わせたい
    • 将来的にライブラリを差し替える可能性がある
    • レガシーコードを新しいシステムに統合する

    Decorator:既存オブジェクトに機能を動的に追加する

    どんな問題を解決するか

    「APIクライアントにログ機能を追加したい」「キャッシュ機能も欲しい」「認証チェックも入れたい」。これらを継承で実現しようとすると、組み合わせの爆発が起きます。Decoratorパターンは、機能を「ラップ」することで柔軟に追加できます。

    TypeScriptでの実装

    HTTPクライアントにログ、リトライ、キャッシュ機能を追加する例です。

    // 基本のHTTPクライアントインターフェース interface HttpClient { get(url: string): Promise; post(url: string, data: unknown): Promise; } // 基本実装 class BasicHttpClient implements HttpClient { async get(url: string): Promise { const response = await fetch(url); return response.json() as Promise; } async post(url: string, data: unknown): Promise { const response = await fetch(url, { method: ‘POST’, headers: { ‘Content-Type’: ‘application/json’ }, body: JSON.stringify(data), }); return response.json() as Promise; } } // Decorator基底クラス abstract class HttpClientDecorator implements HttpClient { constructor(protected client: HttpClient) {} async get(url: string): Promise { return this.client.get(url); } async post(url: string, data: unknown): Promise { return this.client.post(url, data); } } // ログ機能を追加するDecorator class LoggingHttpClient extends HttpClientDecorator { private requestId = 0; async get(url: string): Promise { const id = ++this.requestId; console.log(<code>[${id}] GET ${url}</code>); const startTime = Date.now(); try { const result = await super.get(url); console.log(<code>[${id}] Completed in ${Date.now() - startTime}ms</code>); return result; } catch (error) { console.error(<code>[${id}] Failed: ${error}</code>); throw error; } } async post(url: string, data: unknown): Promise { const id = ++this.requestId; console.log(<code>[${id}] POST ${url}</code>, JSON.stringify(data).slice(0, 100)); const startTime = Date.now(); try { const result = await super.post(url, data); console.log(<code>[${id}] Completed in ${Date.now() - startTime}ms</code>); return result; } catch (error) { console.error(<code>[${id}] Failed: ${error}</code>); throw error; } } } // リトライ機能を追加するDecorator class RetryHttpClient extends HttpClientDecorator { constructor( client: HttpClient, private maxRetries: number = 3, private delayMs: number = 1000 ) { super(client); } private async withRetry(operation: () => Promise): Promise { let lastError: Error | null = null; for (let attempt = 1; attempt <= this.maxRetries; attempt++) { try { return await operation(); } catch (error) { lastError = error instanceof Error ? error : new Error(String(error)); console.log(<code>Attempt ${attempt}/${this.maxRetries} failed. Retrying in ${this.delayMs}ms...</code>); if (attempt setTimeout(resolve, this.delayMs)); } } } throw lastError; } async get(url: string): Promise { return this.withRetry(() => super.get(url)); } async post(url: string, data: unknown): Promise { return this.withRetry(() => super.post(url, data)); } } // キャッシュ機能を追加するDecorator class CachingHttpClient extends HttpClientDecorator { private cache = new Map(); constructor( client: HttpClient, private ttlMs: number = 60000 ) { super(client); } async get(url: string): Promise { const cached = this.cache.get(url); if (cached && cached.expiry > Date.now()) { console.log(<code>Cache HIT: ${url}</code>); return cached.data as T; } console.log(<code>Cache MISS: ${url}</code>); const result = await super.get(url); this.cache.set(url, { data: result, expiry: Date.now() + this.ttlMs, }); return result; } // POSTはキャッシュしない(副作用があるため) } // 使用例:Decoratorを組み合わせる function createHttpClient(): HttpClient { let client: HttpClient = new BasicHttpClient(); // 内側から外側に向かって機能を追加 client = new RetryHttpClient(client, 3, 1000); // リトライ client = new CachingHttpClient(client, 30000); // キャッシュ client = new LoggingHttpClient(client); // ログ(最外層) return client; } // 実行 const httpClient = createHttpClient(); async function fetchUserData() { // ログ → キャッシュチェック → (キャッシュミス時) リトライ付きリクエスト const user = await httpClient.get(‘https://api.example.com/user/1’); console.log(‘User:’, user); }

    使いどころ

    • 既存のオブジェクトに機能を追加したいが、継承は使いたくない
    • 機能の組み合わせが複数パターンある
    • Express/Koaのミドルウェア、Axios/FetchのInterceptorのような構造

    振る舞いパターン

    Strategy:アルゴリズムを差し替え可能にする

    どんな問題を解決するか

    「ユーザーのプランによって計算ロジックが変わる」「地域によって税率計算が異なる」など、同じ処理でもコンテキストによってアルゴリズムを切り替えたい場面があります。

    TypeScriptでの実装

    ECサイトの配送料金計算を例に、地域・配送方法・会員ランクによって計算ロジックを切り替える実装です。

    // 配送料金計算のインターフェース interface ShippingStrategy { calculate(weight: number, distance: number): number; getName(): string; getEstimatedDays(): number; } // 通常配送 class StandardShipping implements ShippingStrategy { calculate(weight: number, distance: number): number { const baseRate = 500; const weightRate = weight * 10; const distanceRate = distance * 0.5; return Math.round(baseRate + weightRate + distanceRate); } getName(): string { return ‘通常配送’; } getEstimatedDays(): number { return 5; } } // 速達配送 class ExpressShipping implements ShippingStrategy { calculate(weight: number, distance: number): number { const baseRate = 1200; const weightRate = weight * 15; const distanceRate = distance * 1.2; return Math.round(baseRate + weightRate + distanceRate); } getName(): string { return ‘速達配送’; } getEstimatedDays(): number { return 2; } } // 翌日配送(プレミアム会員限定) class NextDayShipping implements ShippingStrategy { calculate(weight: number, distance: number): number { const baseRate = 2000; const weightRate = weight * 20; // 距離に関係なく翌日届ける return Math.round(baseRate + weightRate); } getName(): string { return ‘翌日配送’; } getEstimatedDays(): number { return 1; } } // 無料配送(条件付き) class FreeShipping implements ShippingStrategy { constructor(private minimumOrder: number) {} calculate(weight: number, distance: number): number { return 0; } getName(): string { return <code>無料配送(${this.minimumOrder}円以上)</code>; } getEstimatedDays(): number { return 7; } } // 会員ランクによる割引を適用するDecorator的なStrategy class MemberDiscountShipping implements ShippingStrategy { constructor( private baseStrategy: ShippingStrategy, private discountRate: number ) {} calculate(weight: number, distance: number): number { const basePrice = this.baseStrategy.calculate(weight, distance); return Math.round(basePrice * (1 – this.discountRate)); } getName(): string { const discountPercent = Math.round(this.discountRate * 100); return <code>${this.baseStrategy.getName()}(会員${discountPercent}%OFF)</code>; } getEstimatedDays(): number { return this.baseStrategy.getEstimatedDays(); } } // コンテキスト:注文処理 class Order { private shippingStrategy: ShippingStrategy; private items: Array = []; constructor( private customerDistance: number, private memberRank: ‘regular’ | ‘silver’ | ‘gold’ | ‘platinum’ ) { // デフォルトは通常配送 this.shippingStrategy = new StandardShipping(); } addItem(name: string, price: number, weight: number): void { this.items.push({ name, price, weight }); } setShippingMethod(method: ‘standard’ | ‘express’ | ‘nextday’): void { let strategy: ShippingStrategy; switch (method) { case ‘express’: strategy = new ExpressShipping(); break; case ‘nextday’: if (this.memberRank !== ‘platinum’) { throw new Error(‘翌日配送はプラチナ会員限定です’); } strategy = new NextDayShipping(); break; default: strategy = new StandardShipping(); } // 会員ランクによる割引を適用 const discountRate = this.getDiscountRate(); if (discountRate > 0) { strategy = new MemberDiscountShipping(strategy, discountRate); } this.shippingStrategy = strategy; } private getDiscountRate(): number { const rates: Record = { regular: 0, silver: 0.05, gold: 0.1, platinum: 0.2, }; return rates[this.memberRank] || 0; } private getTotalWeight(): number { return this.items.reduce((sum, item) => sum + item.weight, 0); } private getSubtotal(): number { return this.items.reduce((sum, item) => sum + item.price, 0); } calculateTotal(): { subtotal: number; shipping: number; shippingMethod: string; estimatedDays: number; total: number; } { const subtotal = this.getSubtotal(); const weight = this.getTotalWeight(); // 一定額以上で送料無料にする場合 let effectiveStrategy = this.shippingStrategy; if (subtotal >= 10000 && !(this.shippingStrategy instanceof FreeShipping)) { effectiveStrategy = new FreeShipping(10000); } const shipping = effectiveStrategy.calculate(weight, this.customerDistance); return { subtotal, shipping, shippingMethod: effectiveStrategy.getName(), estimatedDays: effectiveStrategy.getEstimatedDays(), total: subtotal + shipping, }; } } // 使用例 const order = new Order(150, ‘gold’); // 距離150km、ゴールド会員 order.addItem(‘TypeScript入門書’, 3000, 0.5); order.addItem(‘デザインパターン本’, 4500, 0.8); // 通常配送 order.setShippingMethod(‘standard’); console.log(‘通常配送:’, order.calculateTotal()); // 速達配送に変更 order.setShippingMethod(‘express’); console.log(‘速達配送:’, order.calculateTotal());

    使いどころ

    • 同じ処理に複数のアルゴリズムがあり、実行時に切り替えたい
    • 条件分岐(if/switch)がアルゴリズムの選択だけに使われている
    • 新しいアルゴリズムを追加する可能性がある

    Observer:イベント駆動と状態監視

    どんな問題を解決するか

    「在庫が一定数を下回ったら通知を送りたい」「ユーザーがログインしたらいくつかの処理を実行したい」など、ある状態変化に対して複数の処理を実行したい場面があります。Observerパターンは、この「購読と通知」の仕組みを提供します。

    TypeScriptでの実装

    型安全なイベントシステムを実装します。

    // イベントの型定義 interface EventMap { ‘user:login’: { userId: string; timestamp: Date }; ‘user:logout’: { userId: string }; ‘cart:add’: { productId: string; quantity: number }; ‘cart:remove’: { productId: string }; ‘order:placed’: { orderId: string; total: number }; ‘inventory:low’: { productId: string; currentStock: number }; } // Observer(購読者)の型 type Observer = (data: T) => void | Promise; // EventEmitter(Subject/Observable) class TypedEventEmitter<TEvents extends Record> { private observers = new Map<keyof TEvents, Set<Observer>>(); on(event: K, observer: Observer): () => void { if (!this.observers.has(event)) { this.observers.set(event, new Set()); } this.observers.get(event)!.add(observer as Observer); // 購読解除用の関数を返す return () => { this.observers.get(event)?.delete(observer as Observer); }; } once(event: K, observer: Observer): void { const unsubscribe = this.on(event, (data) => { unsubscribe(); observer(data); }); } async emit(event: K, data: TEvents[K]): Promise { const eventObservers = this.observers.get(event); if (!eventObservers) return; const promises: Promise[] = []; for (const observer of eventObservers) { const result = observer(data); if (result instanceof Promise) { promises.push(result); } } await Promise.all(promises); } removeAllListeners(event?: K): void { if (event) { this.observers.delete(event); } else { this.observers.clear(); } } } // アプリケーション全体で使用するイベントバス const eventBus = new TypedEventEmitter(); // 各種Observerの実装 // ログ記録 eventBus.on(‘user:login’, ({ userId, timestamp }) => { console.log(<code>[LOG] User ${userId} logged in at ${timestamp.toISOString()}</code>); }); // 分析トラッキング eventBus.on(‘user:login’, async ({ userId }) => { console.log(<code>[ANALYTICS] Tracking login for user ${userId}</code>); // 実際のアプリでは外部サービスにデータ送信 await new Promise(resolve => setTimeout(resolve, 100)); }); // セッション管理 eventBus.on(‘user:login’, ({ userId }) => { console.log(<code>[SESSION] Creating session for user ${userId}</code>); }); // 在庫アラート eventBus.on(‘inventory:low’, async ({ productId, currentStock }) => { console.log(<code>[ALERT] Low inventory: Product ${productId} has only ${currentStock} items</code>); // Slack通知やメール送信など }); // 注文処理後のワークフロー eventBus.on(‘order:placed’, async ({ orderId, total }) => { console.log(<code>[FULFILLMENT] Processing order ${orderId} (total: ¥${total})</code>); }); eventBus.on(‘order:placed’, async ({ orderId }) => { console.log(<code>[EMAIL] Sending confirmation for order ${orderId}</code>); }); // 実際の使用例 class AuthService { async login(userId: string, password: string): Promise { // 認証処理… console.log(<code>Authenticating user ${userId}...</code>); // ログイン成功時にイベントを発火 await eventBus.emit(‘user:login’, { userId, timestamp: new Date(), }); return true; } } class InventoryService { private stock = new Map(); private lowStockThreshold = 10; setStock(productId: string, quantity: number): void { this.stock.set(productId, quantity); if (quantity <= this.lowStockThreshold) { eventBus.emit(‘inventory:low’, { productId, currentStock: quantity, }); } } decreaseStock(productId: string, amount: number): void { const current = this.stock.get(productId) || 0; this.setStock(productId, current – amount); } } class OrderService { async placeOrder(items: Array): Promise { const orderId = <code>ORD-${Date.now()}</code>; const total = items.reduce((sum, item) => sum + item.quantity * 1000, 0); // 仮の計算 console.log(<code>Placing order ${orderId}...</code>); await eventBus.emit(‘order:placed’, { orderId, total }); return orderId; } } // 実行例 async function demo() { const auth = new AuthService(); const inventory = new InventoryService(); const order = new OrderService(); // ログイン → 複数のObserverが反応 await auth.login(‘user123’, ‘password’); console.log(‘—‘); // 在庫が少ない → アラート発火 inventory.setStock(‘PROD-001’, 5); console.log(‘—‘); // 注文 → 確認メール、フルフィルメント処理 await order.placeOrder([{ productId: ‘PROD-001’, quantity: 2 }]); } demo();

    使いどころ

    • あるイベントに対して複数の独立した処理を実行したい
    • 処理の追加・削除を柔軟に行いたい
    • コンポーネント間の結合度を下げたい

    まとめ:パターン選択の判断基準

    この記事で紹介した6つのパターンをまとめます。

    生成パターン

    パターン 使いどころ TypeScriptでの特徴
    Factory Method 種類ごとに異なるオブジェクトを生成 抽象クラス + 具象ファクトリ
    Singleton アプリ全体で1つのインスタンスを共有 private constructor + static getInstance

    構造パターン

    パターン 使いどころ TypeScriptでの特徴
    Adapter 異なるインターフェースを統一 interface + 変換クラス
    Decorator 既存オブジェクトに機能を追加 同じinterfaceを実装してラップ

    振る舞いパターン

    パターン 使いどころ TypeScriptでの特徴
    Strategy アルゴリズムを実行時に切り替え interface + 具象Strategy
    Observer イベント駆動、状態変化の通知 ジェネリクスで型安全なイベント

    学習の次のステップ

    今回紹介したパターンが理解できたら、次のステップとして以下をおすすめします。

    1. 実際のコードベースでパターンを探してみる(React、Express、Prismaなど)
    2. 残りのGoFパターン(Template Method、Composite、Facadeなど)を学ぶ
    3. SOLID原則との関係を理解する
    4. アーキテクチャパターン(Clean Architecture、DDDなど)に進む

    デザインパターンは「覚える」ものではなく「引き出しを増やす」ものです。実際のコードを書きながら、「あ、これFactoryで書けそう」「Strategyにすれば拡張しやすいかも」と気づけるようになることが目標です。